How to Compress a PDF on Mac (Without Losing Readability)
Preview can shrink a PDF in two clicks using a Quartz filter, but the built-in setting is aggressive. Here is how to compress properly and keep text sharp.
Short answer
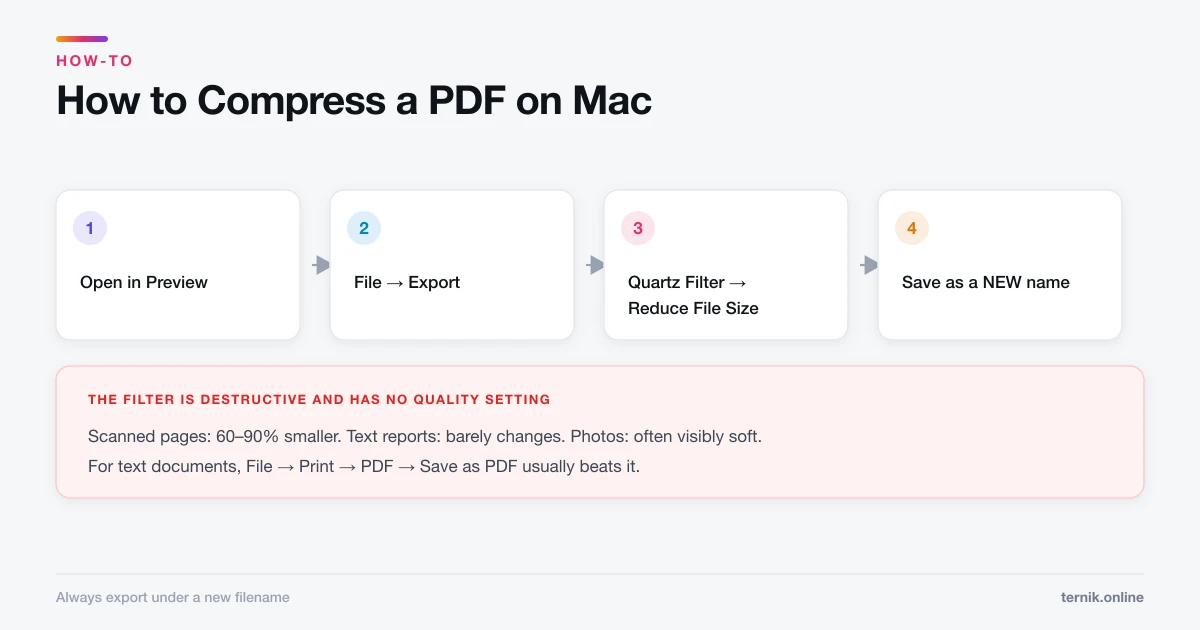
Open the PDF in Preview, choose File > Export, set the Quartz Filter menu to Reduce File Size, and save under a new name. The built-in filter compresses images heavily, so check the result before sending — for text-only documents, exporting to PDF from the Print dialog often gives a smaller file with no visible loss.
Key takeaways
- Preview → File → Export → Quartz Filter → Reduce File Size is the two-click method.
- Always save under a new filename — the filter is destructive and cannot be undone.
- The built-in filter is aggressive on images and can leave photos visibly soft.
- Text-only PDFs barely shrink with it; the size is usually embedded fonts, not images.
- Scanned documents compress the most, because they are really just large images.
How do I compress a PDF on a Mac?
- Open the PDF in Preview.
- Choose File → Export (not Save As).
- Click the Quartz Filter pop-up menu and choose Reduce File Size.
- Change the name in the Export As field so you keep the original.
- Click Save.
Compare the two files. A photo-heavy or scanned PDF typically drops by 60–90%. A text document might shrink by 5%, or occasionally grow.
Why the built-in filter sometimes disappoints
Reduce File Size does one thing: it downsamples and re-encodes embedded images at a fairly low quality target. It does not touch fonts, vector graphics, or document structure.
That explains both outcomes people report:
- A scanned contract goes from 40 MB to 3 MB — it was one large image per page, and the filter had plenty to work with.
- A 12-page report barely moves — its size is embedded font subsets and vector charts, which the filter leaves alone.
- A portfolio becomes unusable — photographs were compressed far past the point where they still look professional.
Because the filter is not adjustable in the interface, the practical skill is knowing when to use something else.
The alternative that often works better
For documents that are mostly text and vector graphics, printing back to PDF frequently produces a smaller file with no visible degradation:
- Open the PDF in Preview.
- Choose File → Print.
- Click the PDF pop-up menu at the bottom left.
- Choose Save as PDF.
This re-generates the document and can drop unused resources and redundant structure. It is not compression in the strict sense, but it regularly halves the size of PDFs exported from word processors.
Which method to reach for
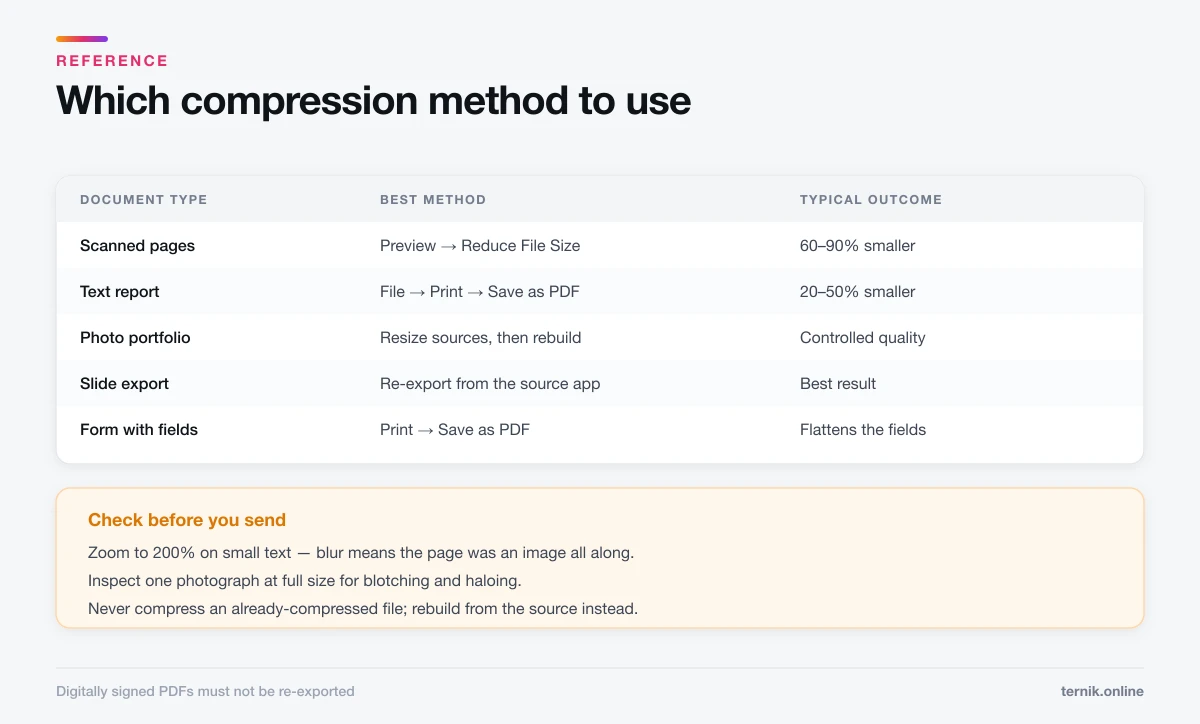
| Document type | Best approach | Typical result |
|---|---|---|
| Scanned pages | Preview → Reduce File Size | 60–90% smaller |
| Photo portfolio | Resize images first, then rebuild | Controlled quality |
| Text report | Print → Save as PDF | 20–50% smaller |
| Slide export | Re-export from the source app | Best of all |
| Forms with fields | Print → Save as PDF | Flattens fields |
That last row matters: printing to PDF flattens interactive form fields, so a filled form stays readable but stops being editable. If the recipient needs to type into it, do not use this method.
Reducing size before the PDF exists
The most effective compression happens upstream. A PDF assembled from 4000-pixel photographs will always be large, whatever you do afterwards.
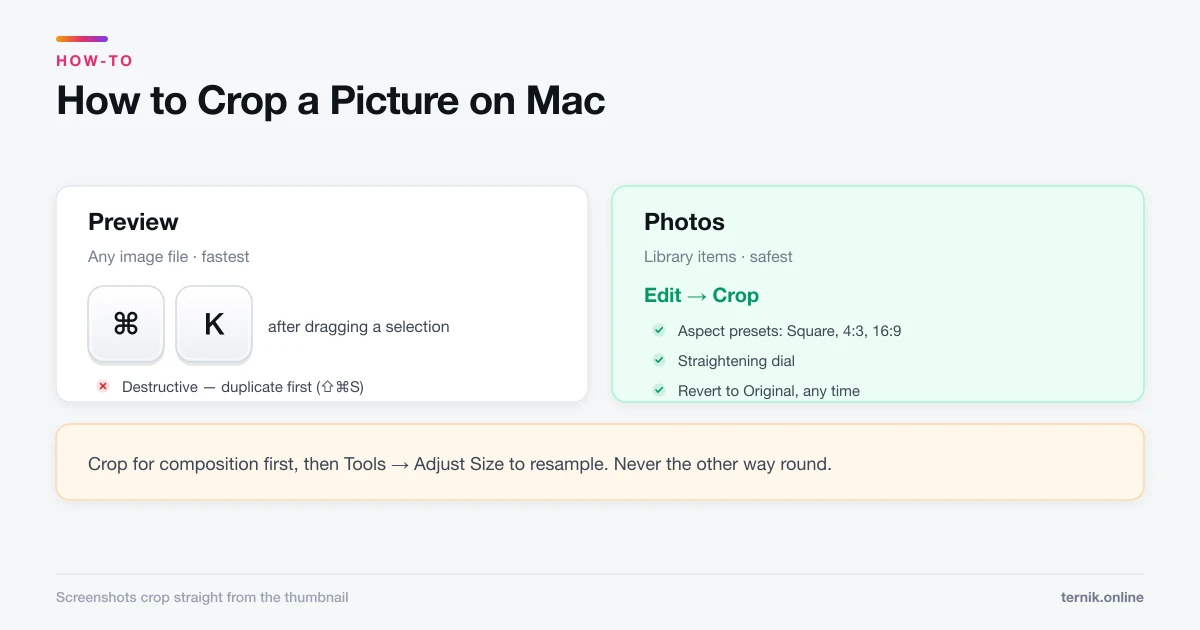
If you control the source images, resize them first. In Preview you can open an image, choose Tools → Adjust Size, tick Resample image, and set a sensible pixel width — 1600 px is generous for on-screen reading, 2400 px for print. The same Preview tools cover cropping a picture if you also want to trim dead space out of each page.
Then export to PDF once, from the app that owns the layout.
Checking the result before you send it
Two checks take thirty seconds and prevent an embarrassing resend:
- Zoom to 200% on a page with small text. Text should stay crisp — the filter does not touch fonts, so blur here means the page was an image all along.
- Look at any photograph at full size. Blotchy skin tones and haloing around edges mean the compression went too far.
If the result fails either check, discard it and rebuild from the source rather than compressing the compressed file. Compressing twice compounds the damage.
When a PDF will not get smaller
Some PDFs are already near their floor. Signs you have hit it:
- The file is text-only and under about 1 MB per 20 pages.
- It was exported from a modern tool that already subsetted fonts.
- It is digitally signed — re-exporting will invalidate the signature, so do not.
At that point the answer is not compression. Split the document, zip it, or send a link instead of an attachment. If disk space rather than email is the problem, PDFs are rarely the real culprit — check System Settings → General → Storage and look at media libraries and old iOS backups first, the same way you would when clearing caches or removing unused apps.
Batch compressing several PDFs
Preview handles one document at a time through the Export dialog, which is tedious for a folder full of files. Two routes scale better: build a Quick Action in Automator using the "Apply Quartz Filter to PDF Documents" action, which then appears in the Finder right-click menu, or script it from the command line — a topic covered in opening and using Terminal.
Whichever you choose, run it against copies. A batch job with a destructive filter and no backups is a bad afternoon.
Frequently asked questions
Open it in Preview, choose File → Export, set Quartz Filter to Reduce File Size, and save under a new name. No third-party software is needed.
Sources
Keep reading
More guides to grow your account.