How to Crop a Picture on Mac (Preview, Photos, and Screenshots)
Preview crops any image file in three clicks and Photos crops non-destructively. Here is which to use, plus how to crop to an exact aspect ratio.
Short answer
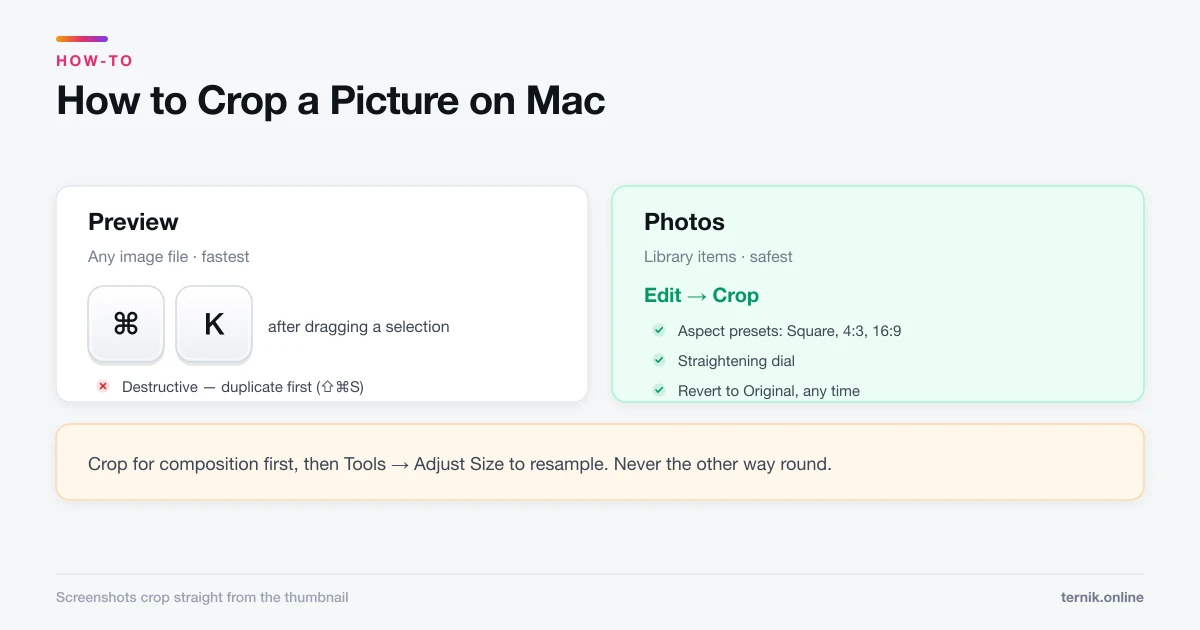
In Preview, open the image, drag a selection, and press Command-K to crop. In Photos, double-click the image, click Edit, then Crop — which is non-destructive and reversible at any time. Screenshots can be cropped immediately from the thumbnail that appears after capture.
Key takeaways
- Preview: open the image, drag a selection, press ⌘K.
- Photos: double-click → Edit → Crop — non-destructive and always reversible.
- Preview edits are destructive unless you duplicate first (⇧⌘S).
- Screenshots can be cropped straight from the thumbnail before it disappears.
- Hold Shift while dragging to constrain the selection to a square.
How do I crop a picture on a Mac?
Preview is the fastest route for a file sitting in a folder:
- Double-click the image to open it in Preview.
- Drag a rectangle over the part you want to keep.
- Press Command-K (or Tools → Crop).
- Press Command-S to save.
Three clicks and a keystroke. If the selection tool is not active, click the Markup toolbar button (the pen tip) and choose the rectangular selection tool.
Preview or Photos?
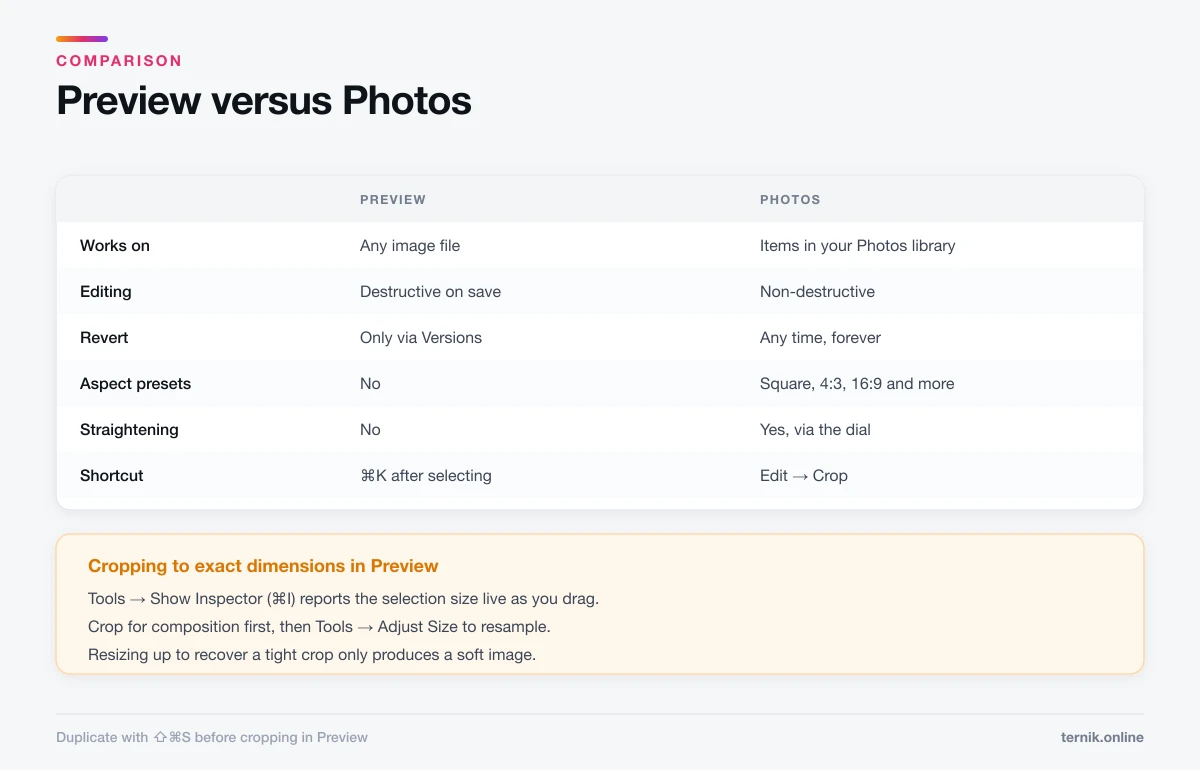
They behave fundamentally differently and the distinction matters.
| Preview | Photos | |
|---|---|---|
| Works on | Any image file | Items in your library |
| Editing | Destructive on save | Non-destructive |
| Revert | Only via Versions | Any time, forever |
| Aspect presets | No | Yes |
| Straightening | No | Yes |
Preview overwrites the original when you save. If the image matters, duplicate it first with Shift-Command-S, or use File → Export to write a new file.
Photos never destroys the original. Crop as often as you like; Revert to Original in the Edit view always brings back the full frame. That safety is the reason to use Photos for anything you might want back.
Cropping in Photos
- Double-click the image, then click Edit at the top right.
- Click Crop.
- Drag the corner handles, or pick a ratio from the Aspect list — Square, 4:3, 16:9, and others.
- Use the dial below the image to straighten a tilted horizon.
- Click Done.
The Aspect presets are the practical advantage over Preview. Cropping to an exact 16:9 or square by eye in Preview is guesswork; here it is one click.
Cropping a screenshot immediately
After you take a screenshot, a thumbnail appears briefly in the bottom-right corner. Click it before it fades and Markup opens with the crop tool ready — no need to find the file at all.
Missed it? The file is on your Desktop by default; right-click it and choose Open With → Preview, then crop as above. Better still, capture only what you need in the first place: Shift-Command-4 drags a selection at capture time, which is covered fully in how to take a screenshot on a Mac.
Cropping to exact dimensions
When a form demands precise pixels, Preview can do it if you make the numbers visible:
- Open the image in Preview.
- Choose Tools → Show Inspector (⌘I).
- Drag a selection — the Inspector reports its size live.
- Adjust until the numbers match, then press ⌘K.
For an exact output size rather than an exact crop, crop first for composition, then use Tools → Adjust Size to resample to the required pixel dimensions. Tick Scale proportionally unless you deliberately want distortion.
Cropping removes pixels permanently, so crop before resizing rather than after — resizing up to recover a tight crop just produces a soft image.
Batch cropping several images
Preview handles a batch better than most people expect: select several images in Finder, open them together, and they appear in one Preview window's sidebar. Tools → Adjust Size then applies to every selected thumbnail at once.
Cropping, however, is per-image, because the useful crop differs each time. For genuinely identical crops across many files, an Automator Quick Action or a Terminal tool is the scalable route — see how to open Terminal on a Mac if you want to go that way.
Keeping file sizes sensible
Cropping reduces pixel count and usually file size, but not always by much — a heavily compressed JPEG re-saved by Preview can grow.
If size is the objective, crop first, then Tools → Adjust Size with Resample image ticked, and export as JPEG with a moderate quality setting. For images destined for a PDF, doing this before assembly beats compressing the finished PDF, because you keep control of quality.
If Preview will not let you edit
Two common causes. The file may be locked — open Get Info (⌘I in Finder) and untick Locked. Or it may be in a read-only location, such as a mounted disk image or a folder without write permission; copy it to your Desktop first.
If Preview crashes on launch instead, that is a corrupt preference or cache rather than a file problem — clearing that app's cache is the targeted fix.
Frequently asked questions
Command-K, after dragging a selection over the area you want to keep. Command-S then saves the change.
Sources
Keep reading
More guides to grow your account.