How to Run a Diagnostic on Mac (Apple Diagnostics Guide)
Apple Diagnostics tests your Mac's hardware in a few minutes and returns a reference code. Here is how to start it on Apple silicon and Intel Macs, and what each code means.
Short answer
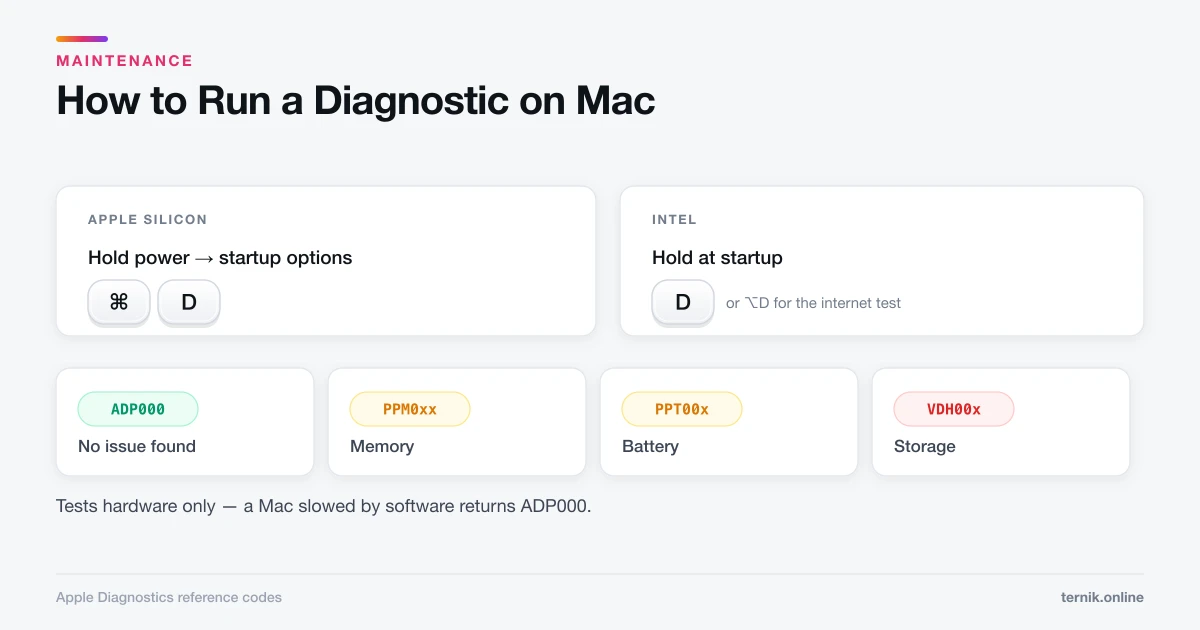
Shut down the Mac, then hold the power button on Apple silicon (or press D at startup on Intel) and run Apple Diagnostics. It tests memory, logic board, power, and sensors in two to five minutes and returns reference codes describing what it found. It checks hardware only — it will not diagnose software problems.
Key takeaways
- Apple silicon: shut down, hold the power button until startup options appear, then press Command-D.
- Intel: shut down, then hold D while powering on.
- The test takes two to five minutes and returns reference codes such as
PPM002orNDD001. ADP000means no issues found — the hardware passed.- Apple Diagnostics tests hardware only. Software problems return a clean result.
How do I run a diagnostic on my Mac?
Disconnect every external device except keyboard, mouse, display, and power. Shut the Mac down completely. Then:
On Apple silicon (M1 and later), press and hold the power button until "Loading startup options" appears, then press Command-D.
On Intel Macs, press the power button and immediately hold D until a progress bar or language picker appears. If that fails, use Option-D to run the test over the internet instead.
Apple Diagnostics starts on its own and takes two to five minutes. Do not interrupt it. When it finishes you get a plain-language description and one or more reference codes.
Before you start
Five minutes of preparation prevents most false results:
- Unplug external peripherals. Hubs, drives, and docks are a common source of misleading errors. Keep only what you need to see the screen and press keys.
- Connect to power. A laptop that sleeps mid-test gives you nothing.
- Put the Mac on a hard surface. Thermal sensor tests can misread on a bed or couch.
- Note the symptom first. "Fans loud under no load" is far more useful to a technician than "it feels slow".
What Apple Diagnostics actually tests
The suite is narrower than most people expect. It covers:
- Memory (RAM)
- Logic board and processor
- Power adapter, battery, and charging circuitry
- Thermal sensors and fans
- Wireless hardware presence
- Display and graphics hardware
It does not test your storage drive for filesystem corruption, evaluate battery cycle count, benchmark performance, or find software faults. A Mac made unusable by a login-item loop or a failing app will pass cleanly.
Reading the reference codes
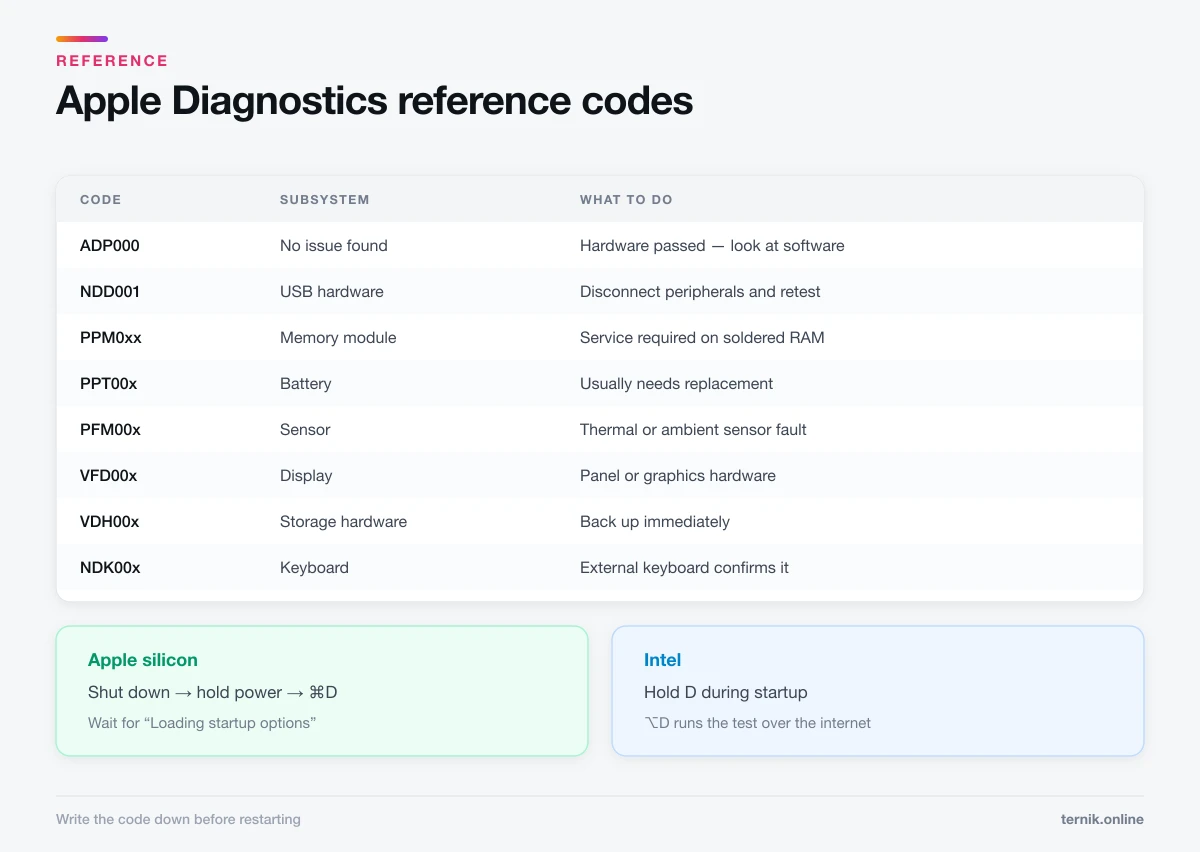
Codes are grouped by subsystem. The common ones:
| Code | Meaning |
|---|---|
ADP000 |
No issue found |
NDD001 |
USB hardware issue |
PPM0xx |
Memory module issue |
PPT00x |
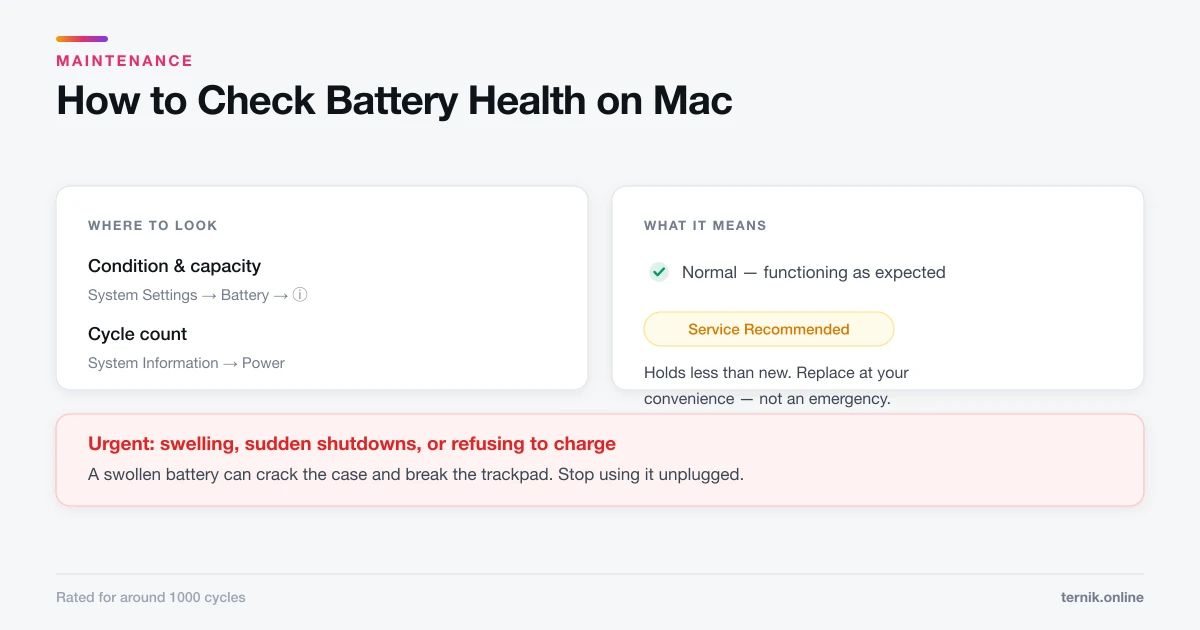
Battery issue — often needs replacement |
PFM00x |
Sensor issue |
VFD00x |
Display issue |
VDH00x |
Storage hardware issue |
NDK00x |
Keyboard issue |
Write down the exact code before restarting. It is the single most useful thing you can hand a technician, and it saves them repeating the test.
ADP000 is the result you want. It means the hardware passed — and it also means that if the Mac is still misbehaving, the cause is software.
When the diagnostic passes but the Mac still misbehaves
This is the common outcome, and it is genuinely informative: it narrows the problem to software. Work through these in order.
Check Activity Monitor. Open Activity Monitor from Applications → Utilities and sort by % CPU, then by Memory. A single process pinned at 100% explains most "my Mac is slow" reports. Note the name before quitting it — a process that returns after every restart is a login item or a background agent.
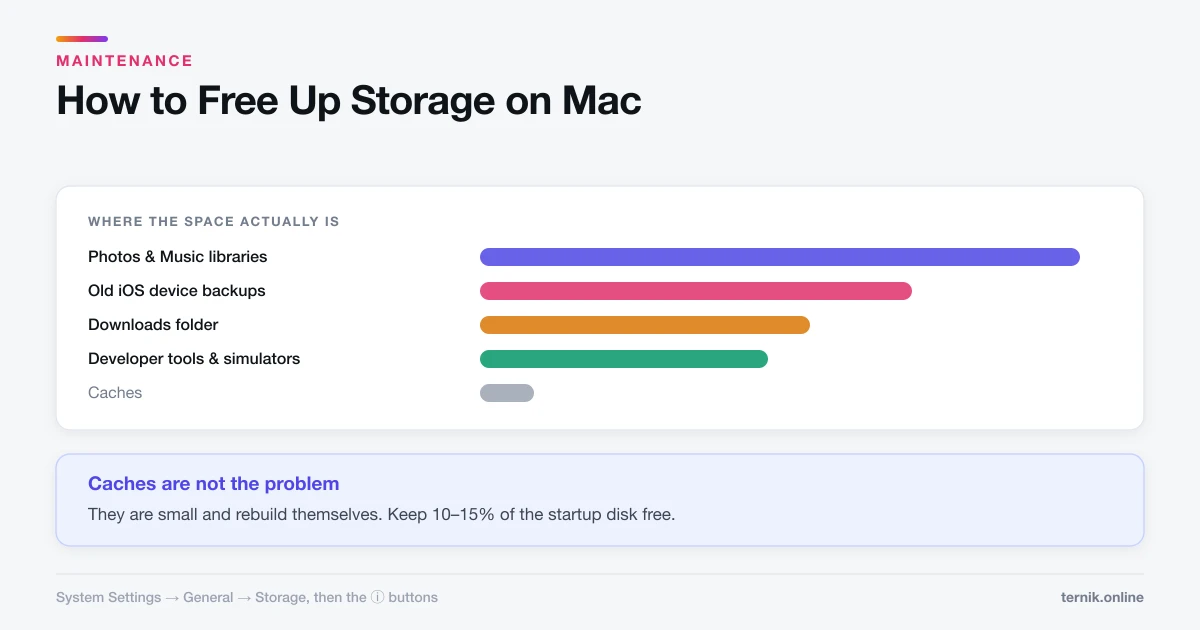
Check free disk space. Under System Settings → General → Storage, a startup disk with less than roughly 10% free will cause stalls, beachballs, and failed updates. Free space first, then reassess.
Audit login items. System Settings → General → Login Items lists what launches at startup, including background extensions from apps you may have removed. Disable anything unfamiliar and restart.
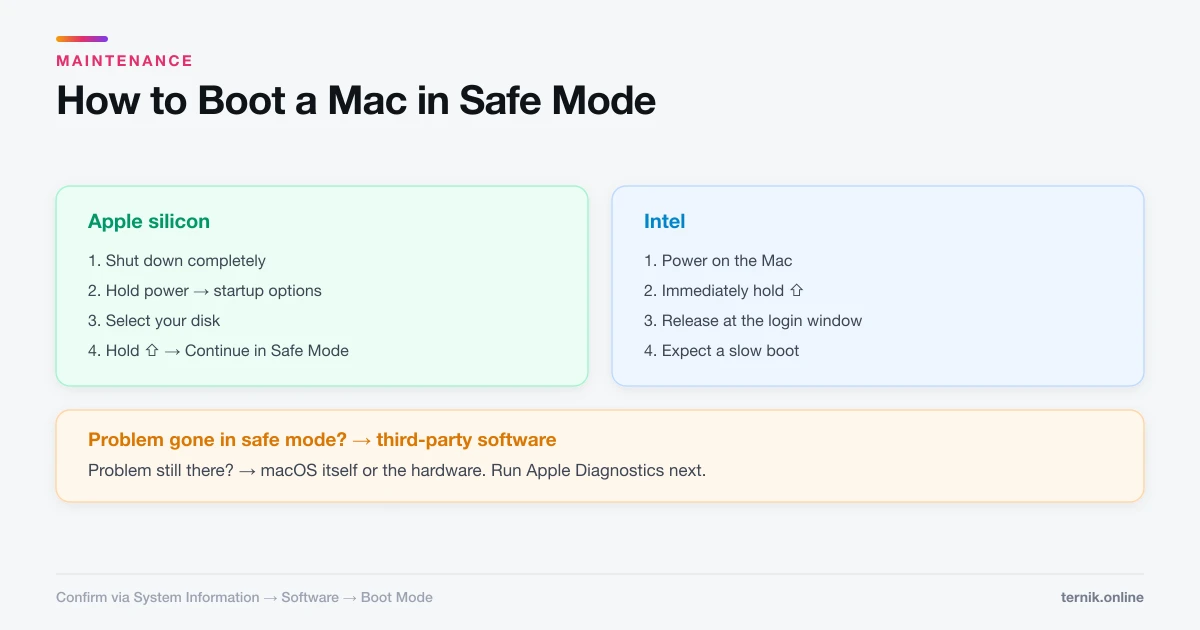
Boot into safe mode. Safe mode loads a minimal system. On Apple silicon, hold the power button, select your startup disk, then hold Shift and click "Continue in Safe Mode". On Intel, hold Shift during startup. If the problem disappears in safe mode, it is caused by third-party software rather than the Mac itself.
Rule out malware. Adware is a frequent cause of slowdowns and pop-ups that hardware tests will never see — see how to check for malware on a Mac.
If the diagnostic will not start
- Nothing happens on Intel. Try Option-D for the internet-based test, which needs Wi-Fi.
- A firmware password is set. Diagnostics is blocked until you enter it.
- A third-party keyboard is attached. Key combinations at startup are unreliable on some non-Apple keyboards. Borrow a wired Apple keyboard, or use the built-in one on a laptop.
- The screen stays black. If the display itself has failed the test may be running invisibly. That is a service appointment.
Apple Diagnostics versus Apple Support Diagnostics
Apple Diagnostics is the customer-facing tool described here. Apple Support Diagnostics is a more detailed suite that Apple technicians run in store, and it reports considerably more than the consumer version. If your ADP000 result conflicts with obvious symptoms, a Genius Bar appointment gets you the deeper test.
For third-party utilities: hardware monitors that report SMART status and battery health are useful and honest. "Cleaner" apps that claim to fix hardware faults are not — no software can repair failing memory or a swollen battery.
A sensible maintenance rhythm
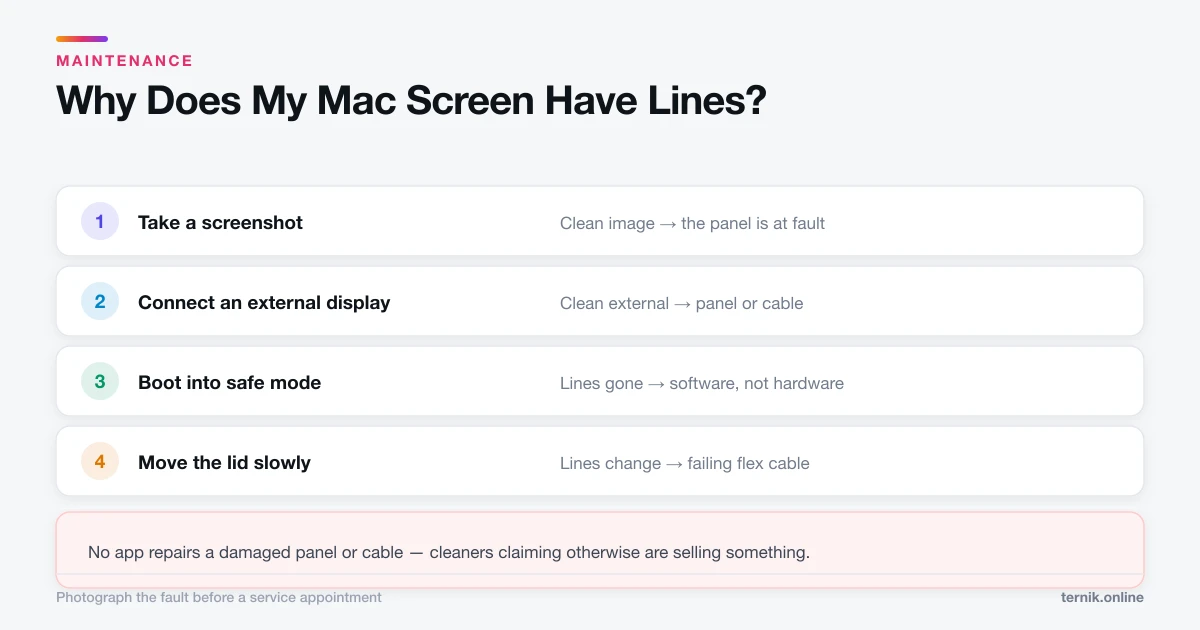
Run Apple Diagnostics when something changes — new noise, unexpected shutdowns, charging trouble, a kernel panic. Running it monthly on a healthy Mac tells you nothing you did not already know. Visual faults are the exception worth testing promptly — lines across the display can be a cable, a panel, or a GPU, and the tests differ.
Between tests, the habits that actually matter are unglamorous: keep 15% of the startup disk free, install macOS updates, restart weekly rather than sleeping indefinitely, and remove apps you no longer use along with their background helpers.
Frequently asked questions
No issues found. Your hardware passed every test in the suite. If the Mac is still misbehaving, the cause is software rather than hardware.
Sources
Keep reading
More guides to grow your account.